

Microsoft Dynamics CRM 2016 contains a new type of knowledge base article that provides functionality similar to Parature style knowledge base articles. You may wish to use these articles within Unified Service Desk. In this post I will explore this concept.
If you are researching knowledge base articles you may have already read the Microsoft walkthrough on using the Parature knowledge Base within Unified Service Desk. If you haven’t looked that up yet, I suggest you read it!
https://msdn.microsoft.com/en-us/library/mt162236.aspx
This posts will broadly follow the logic explained in the Microsoft Walkthrough. Except, I’m going to adapt it slightly and also focus on CRM Knowledge Articles rather that Parature. I’m going to assume you know how to use the new style articles in the interactive hub! If not, you’ll need to configure this and create some articles before you start!
This USD change is fairly complicated, so I am also assuming you have a pretty good knowledge of USD. The steps involved are;
- Create an option (Optional)
- Create a KB Search hosted control
- Create an action to display KB
- Create action to search KB
- Create a hosted control to hold the article
- Create an action to set context of selected article
- Create an action to navigate to the article
- Create an action to show article
- Add the actions to the ResultOpen event.
- Action to associate the article to the incident
There are quite a lot of steps in this, but stick with it and take it slow. You’ll be fine! (Each step is easy!)
Step One – Create an option (Optional)
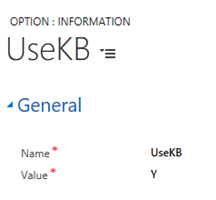
You can skip this step is you like! In my Unified Service Desk (USD) solution I like to make each key feature optional. Giving me the control to easily turn features on and off. So my customization started with me creating an option called “UseKB”, which I’d later use to decide if this knowledge base functionality should be active or not.
To create the option, navigate to the USD settings and find the “Options” area. Then create a new option. You can see below that I simply called it “UseKB” and set the value to “Y”. (I’ll change it to “N” if/when I want to turn off the knowledge base functionality.)
Step Two – Create a KB Search hosted control
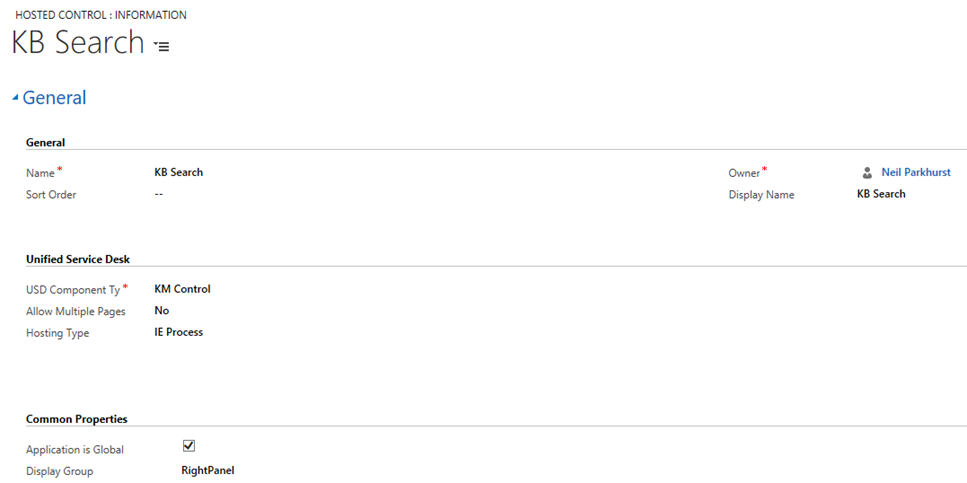
Next you will need a hosted control to hold your knowledge base. (Mine is below) Notice that the USD Component type is “KM Control”. Also notice that the application is global and that the display group is RightPanel.
Tip: You could of course use MainPanel for the display group if you’d like. If your operators have multiple screens you may also wish to consider using “FloatingPanel”. As this would allow them to move the knowledge search onto a second monitor.
Step Three – Create an action to display KB
Next you will need an action to display to the knowledge base search hosted control you’ve just created. For this simply create a “default” action for the KB Search control. Mine is shown below.

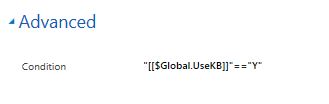
An optional step here is to make use of the option you may have created in step one. You can see that I have set the condition on this action to be “[[$Global.UseKB]]”==”Y”, doing this will mean the action won’t operate if this option isn’t set.

Having created the action to display the knowledge search you’ll need to trigger it. This is done by adding the newly created action to the “SessionNew” event on the CRM Global Manager hosted control. Effectively meaning the knowledge search is available whenever a session is loaded.
Tip:
One refinement you might want to make is consider if this is the best point to open the search. Maybe in your application you might only want the knowledge base search to be visible when an incident is loaded. Or maybe you always want it even if a session isn’t open. So play around with moving this to the BrowswerDocumentComplete event on you incident or maybe the DeskTopReady event on you CRM Global Manager.

Step Four – Create an action to Search KB
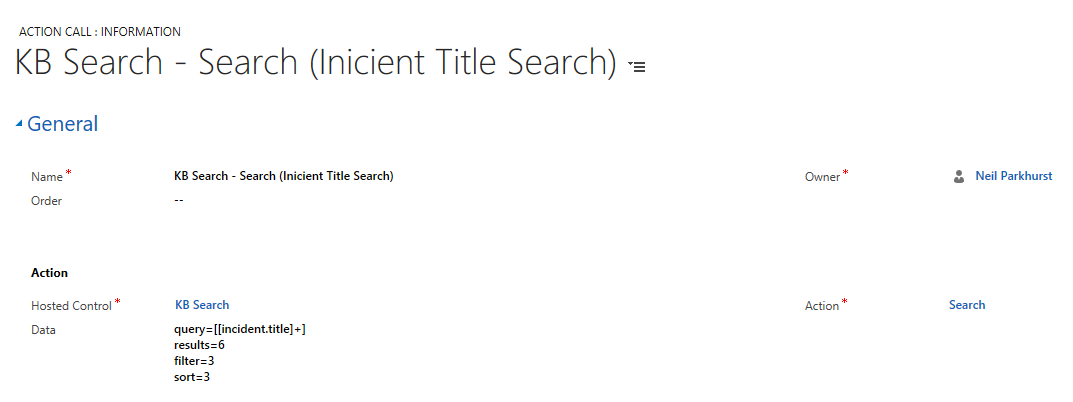
Now you will need an action to search the knowledge base, this is going to be triggered each time a case is opened. I created mine with the following values.
| Item | Setting |
| Hosted Control | KB Search |
| Action | Search |
| Data | query=[[incident.title]+]
results=6 filter=3 sort=3 |
It looked like this …
Tip: A quick note about the data values ….
query, this is a string value to search the knowledge base. I am searching using the incident title, you could use incident description or another field.
results, this value defines the maximum number of results to return. It can be any number from 1 to 20. The default is 10, if you don’t add this option.
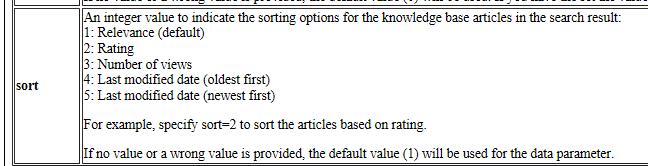
filter, I’ve used “filter=3”. This means all published articles will be searched. (Other options are shown below.)
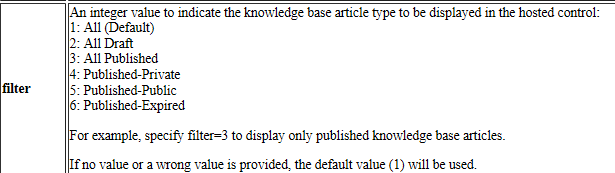
sort, I’ve gone with “sort=3”. This sorts the articles by the most viewed first. Other options are shown below.
blockClick, I haven’t used this option! Setting this can prevent the article from opening when clicked. I am unclear why you’d want to do that. So I haven’t used this option!
And finally, if you created the option in step one. Add the following condition to this action. (“[[$Global.UseKB]]”==”Y”)
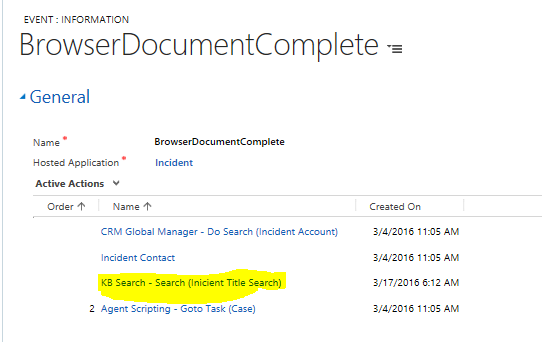
Now you have the action to do the search you’ll need to trigger it each time a case is loaded. This can be done by adding the action to the “BrowserDocumentComplete” event of your incident hosted control.
Mine is shown below, with the action highlighted. Notice that I have other actions here! You don’t need to worry about these your application may or may not already have additional actions occurring when an incident loads.
Step Five – Create a hosted control to hold the article
Now you have found the article you require, you’ll want to display it. For this you’ll need another hosted control that will display the article into.
See below that I have created a hosted control with the following signifciant settings;
| Field | Details |
| Name | Article |
| Display Name | [[Article.question]+] |
| USD Component Type | Standard Web Application |
| Application is Global | NOT selected |
| Display Group | MainPanel |
Tip:
Again the display group could be “FloatingPanel” if you are using multiple screens. So maybe play around with this!

Step Six – Create an action to set context of selected article
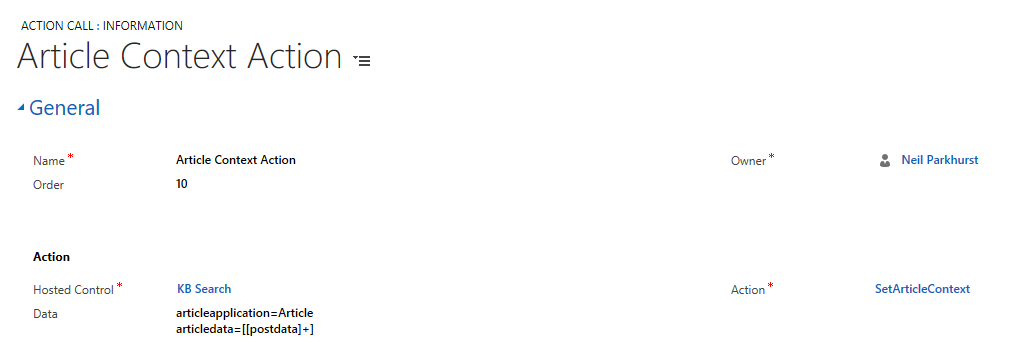
Now you have a hosted control to hold the selected article you will need to create an action that effectively loads the article into the context. You use the “SetArticleContext” action on you KM Control hosted control to do this. Mine is below. Notice that the order is 10. (That will make sense in a second!)
The data portion contains the command needed to set the selected article.
articleapplication=Article
articledata=[[postdata]+]
Step Seven – Create an action to navigate to the article
Ok, now you have the article in the context you will need an action to navigate to that article. So you’ll need a navigate action on the hosted control you earlier created to display the article.
Notice that the order is 20. (A larger number than the action you just created to copy the details into the context!)
The data portion defines the logic needed to navigate to the article.
url=[[KB Search.articleurl]]
header=[[header]+]
postdata=[[postdata]]

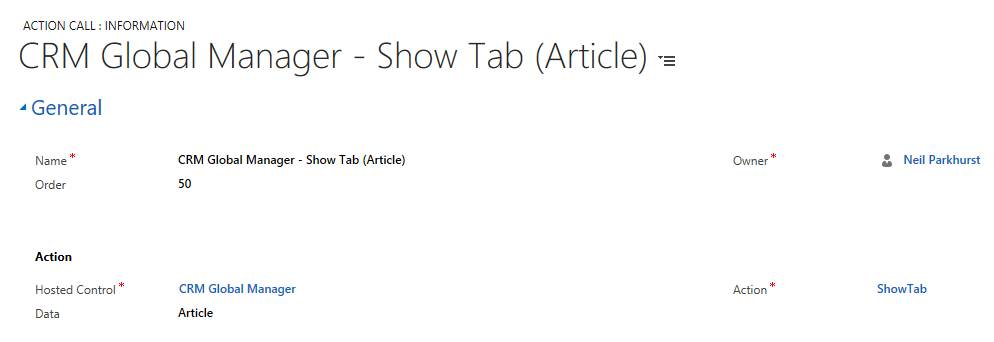
Step Eight – Create an action to show article
Now another action is needed, having copied the article to the context and navigated to the artcile you are going to want to give the article focus. You use a ShowTab action to do this.
Notice that the hosted control is “CRM Global Manager” and that the action is “ShowTab”. Next set the data portion to the name of the hosted control you created to hold the article. So in thios example “Article”.
Also notice that the order is 50. A number larger than the last two actions we created!
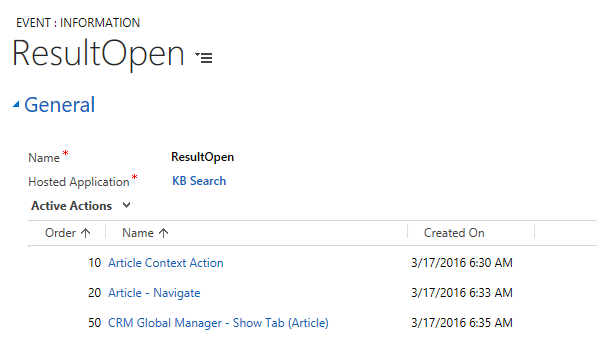
Step Nine – Add the actions to the ResultOpen event.
Right, you have just created three actions that will need to be triggered! The event these need to be associated with is one called “ResultOpen” on your KM control. In this example we called our KM Control “KB Search”. So navigate to the events on the KB Search hosted control and add the three actions we just created.
Notice the order!
Step Ten – Action to associate the article to the incident
Now, assuming the article you are viewing is useful you’ll want to be able to associate (link) it to the incident currently being viewed. To do this we create an Associate action on the KM control. (We called it KB Search.) Notice the data portion, as this contains the code needed to link the article being viewed to the incident.
entitytypename=incident
recordid =[[incident.Id]]
articleuniqueid=[[Article.articleUId]]
articletitle=[[Article.question]]
articleprivateurl=[[Article.url]]
articlepublicurl=[[Article.publicUrl]+]
Note:
You can probably omit the last line! As the knowledge articles (unlike Parature) don’t have a public Url. So this is always blank.

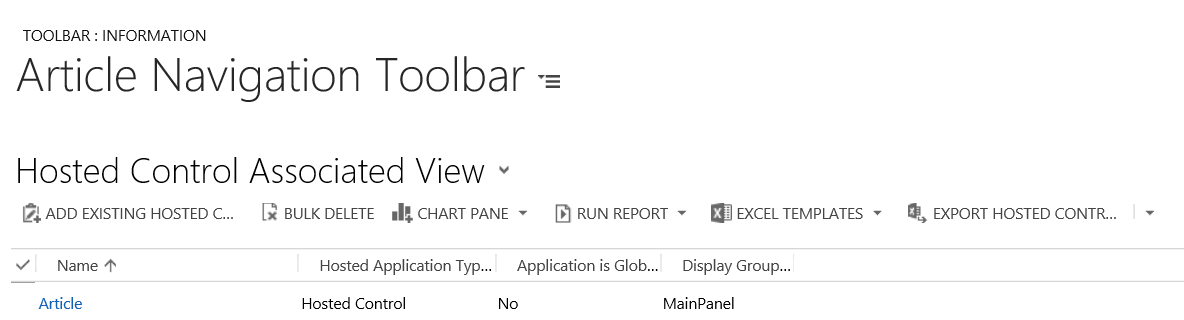
Step Eleven – Create a Toolbar
Next you are going to create a toolbar that contains a button to allow the action you just created to be called. So go to the toolbars section of USD settings and create a new toolbar. I called mine “Article Navigation Toolbar”.

Once you have saved the toolbar, you’ll need to navigate to the “hosted control associated view” from the toolbars navigation bar. Once there add the “Article” hosted control to the toolbar.
Now you are ready to add a button to the toolbar. Mine is shown below. Here you can see that I have a toolbar button called “Link Article” and that I have added the action we just created to link the article to the current incident.
Quick note:
In the Parature walk through you will see that a second button is described which copies the public url of the article to the clip board. I assume to allow this to then be pasted into an email to the customer. I haven’t described this feature here as the internal knowledge base articles won’t have a public facing url.

Once my button had been saved, my toolbar looked like this.

Testing time!
So having completed all of your hard work, now it is time to test the application. Below you can see that I have loaded a case with the word “Return” in the title. This has triggered my knowledge base search to return an article about returning items.
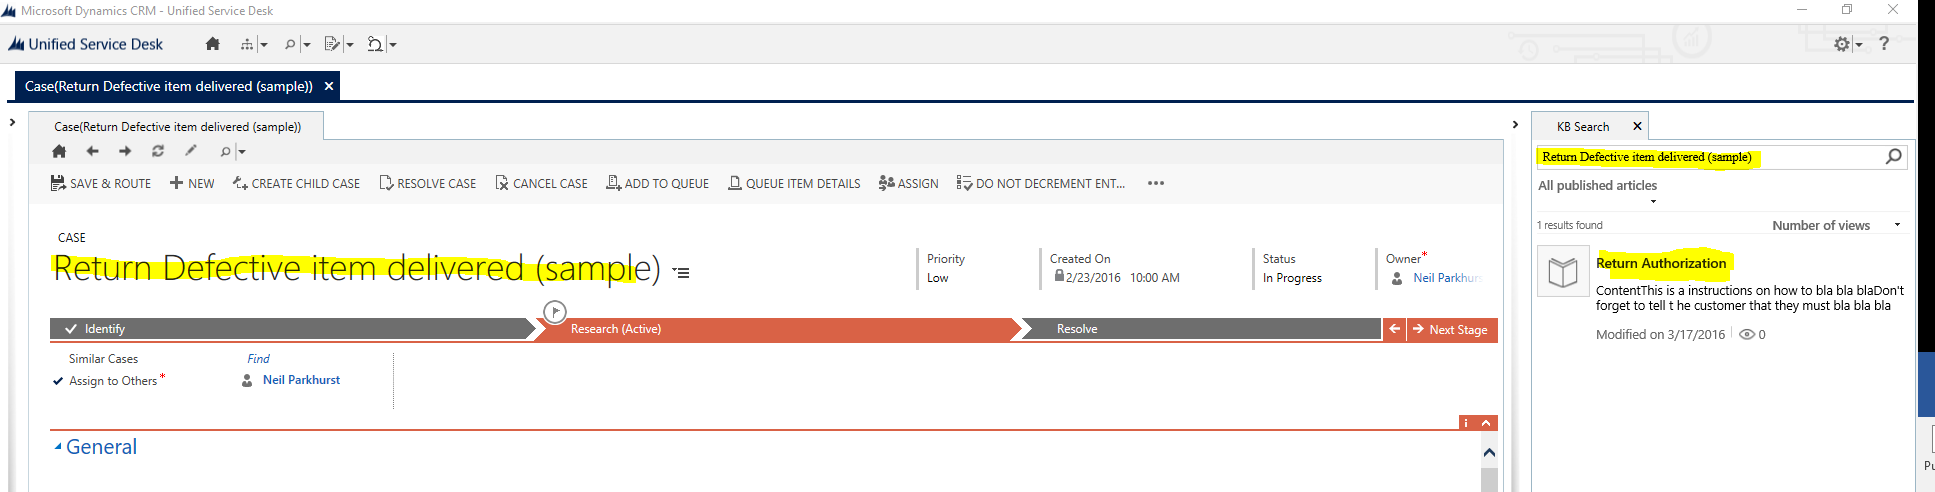
Clicking on the article loads it in a tab, as I have shown below. Notice that the rich content of the article is displayed in the tab. (I say rich, this is a pretty basic example!!)

Finally, if I click the “Link Article” button you can see that a notification is displayed in my search tab noting that this article has just been linked to the case.

I hope you have found this post useful. Enjoy. J


Leave a comment