

Microsoft’s Omnichannel for Customer Service makes use of Unified Routing to allocate (assign) work items to agents. Typically, once a conversation or record is routed to a queue, we use either “Highest capacity” or “Round Robin” logic to assign work items to the next available agent. But we can also create custom assignment methods to handle more complex scenarios, in this post I will explain how a custom rule might be used.

To demonstrate custom assignment rules, I will document one example scenario. In my example I want to route lead record to agents. (But I could be routing any entity or conversation!) Imagine some leads are created with an owner of “Sales Team”. When that happens, I want to route to the next available agent in my queue, maybe on a round robin basis. But if a lead is created with the owner set to a specific user instead of a round robin allocation I want to force that lead to be routed to the owner.
For my example I have decided to refine a workstream I have previously created to allocate leads. Currently it routes all leads to a queue and then a highest capacity logic would be applied to select an agent.
Below you can see that I have opened my workstream in the “Customer Service Admin Center”. You could also use the “Omnichannel Admin Centre”. But I have used the customer service one as it is the newer experience. (Being new, I assume in the fullness of time it might replace the Omnichannel admin center!)
Notice that my distribution method is push and that I have allowed all presences. (That worked for me as this is a test.) But in a real implementation you might decide to only push records to users that are “available” or “busy”.
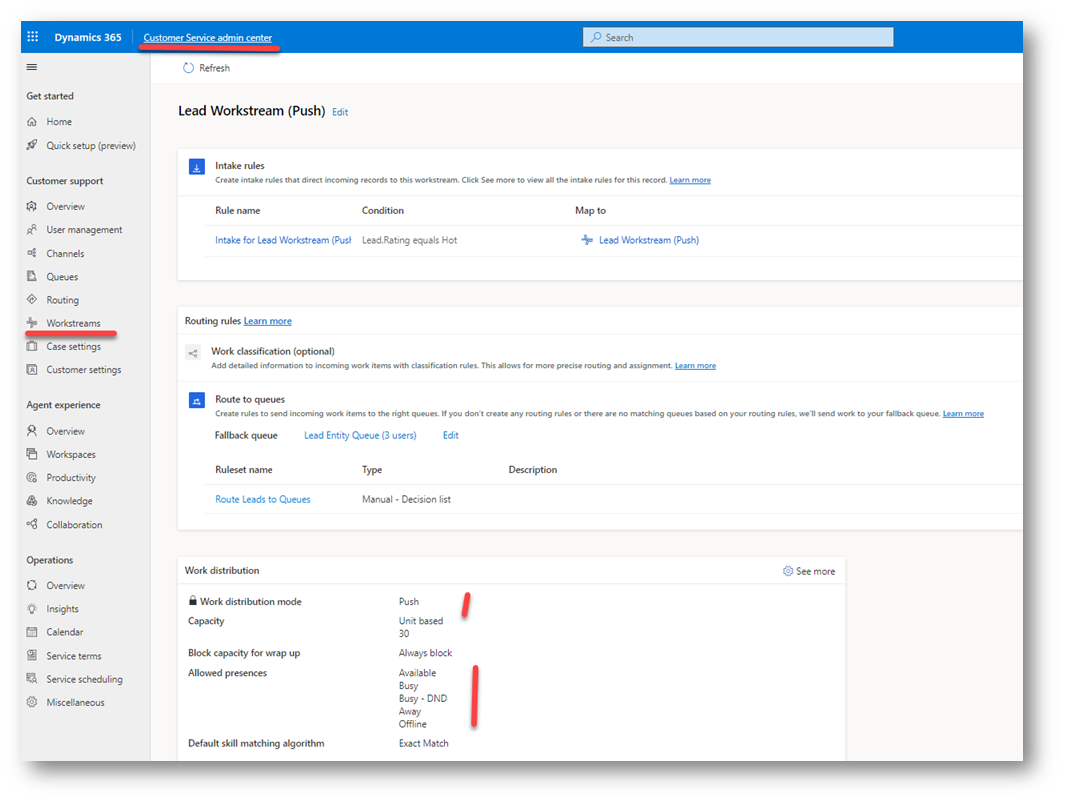
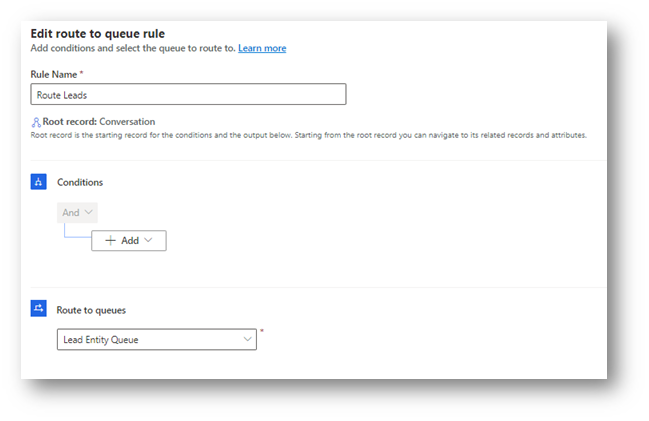
My routing logic could not be simpler!! I have one queue called “Lead Entity Queue”. Then I have a single routing ruleset that will route all lead records to this queue. You can see below that I haven’t even added a condition to my ruleset.
If we open a queue, we typically see that the assignment method is “round robin” or “highest capacity”. It is this setting that decides what logic will be used to select which agent in the queue will be allocated each work item.
Highest capacity would look for the agent with the highest spare capacity. So, the least busy agent. Using round robin would allocate work items to each agent in sequence, meaning the workload would be evenly spread across all agents.
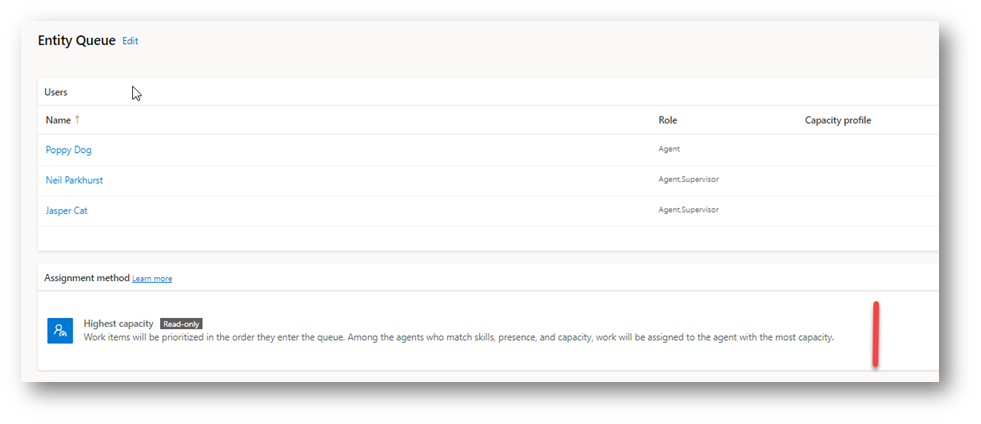
But if we look at my lead entity queue, we can see that I have applied a custom assignment rule. Clicking “See more” allows me to select an alternative assignment logic. Additionally, from this screen we can use “Create new” to create a new custom assignment rule. Or use “edit” to amend the logic of an assisting custom rule.
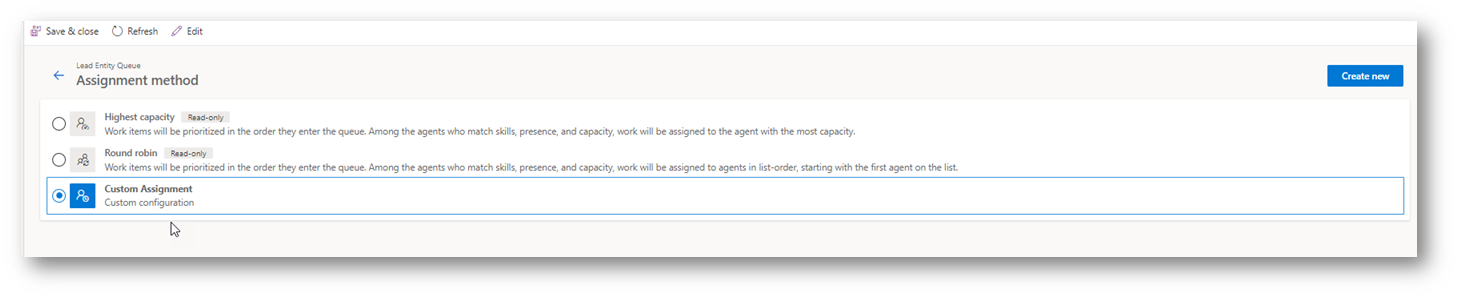
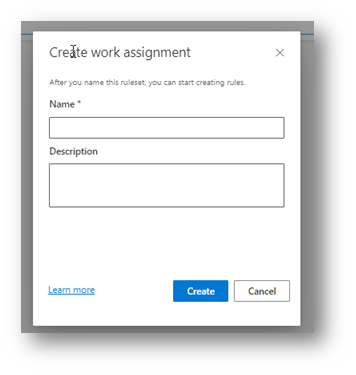
In my example when I clicked “Create new” I first gave my rule the name “Custom Assignment”. You’d probably want to give your rule a more descriptive name!
Opening my custom method shows that I can define a ruleset to sequence workitems in my queue and a second ruleset to assign the next item to my agent.
In this example I haven’t added a prioritization. Meaning my lead records will be allocated in the order they enter the queue. If I had a “busy” queue I could have opted to assign the “warmest” leads first.
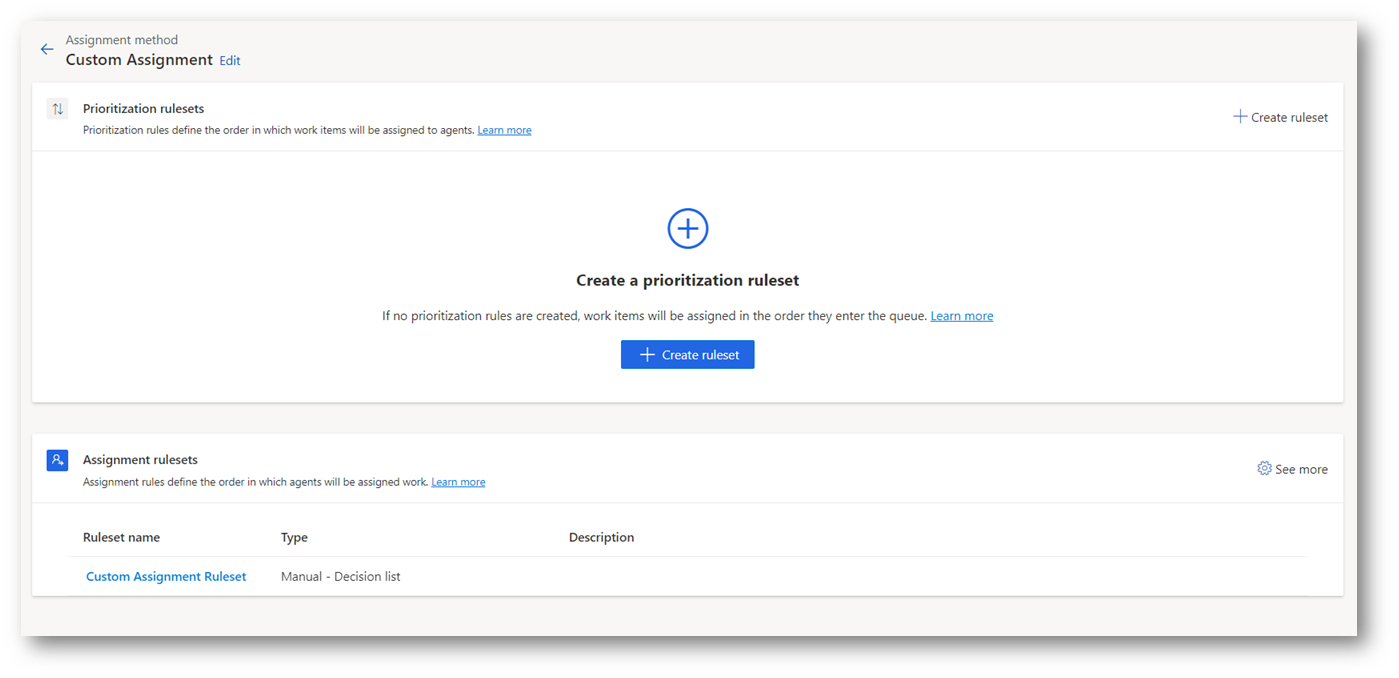
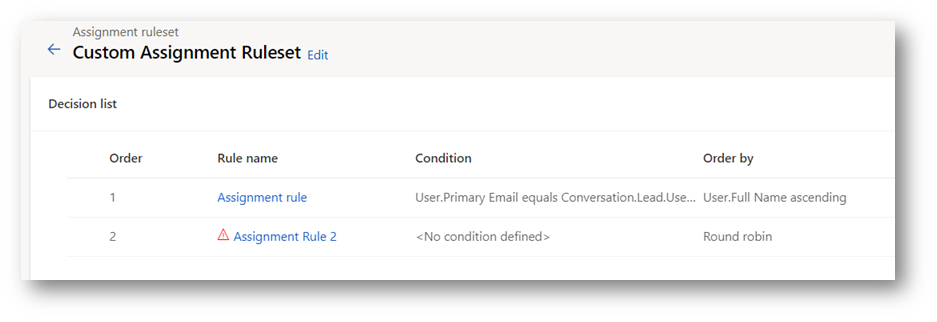
I have then created an assignment ruleset. In my example I have called this “Custom Assignment Ruleset”. My ruleset is shown below. Notice below that I have two rules in my decision list. The logic being that each of these will be evaluated in turn. As soon as one of the rules finds a suitable agent it will be applied. But if no agents are found to match the rule, then the next rule will be evaluated.
Notice that I have a condition on my first rule and none on my second rule. Meaning all work items that aren’t processed by my first rule will be evaluated by the second rule.
Let’s look at my first rule in a little more detail! I have given it a name of “Assignment rule”. I then have a condition.
We have two types of condition. Static and dynamic. I have used a dynamic condition. This means that the first column on the left will be a field from the systemuser record for my agents. I have selected “Primary Email” but I could have equally picked other fields like “fullname”.
The right side of my condition will be evaluated on the conversation / work item being routed. So, in my example the lead record.
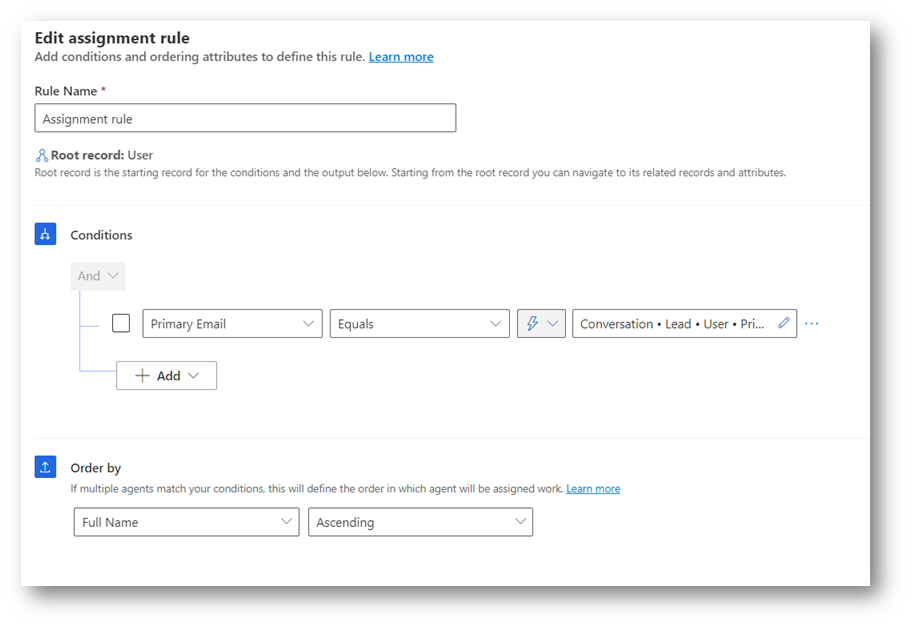
If I expand the right side of my condition, you can see better what is being done. In the first box I select attributes from my conversation record or a related entity. I have opted to select “Lead” from my record routing.
In the second box I can filter on any attribute from my lead. Or I can select another related entity. I want to assign based on the owner of the lead. So, I have selected the systemuser record of the owning user.
Finally in my third option I have selected the primary email of the owner of the owner of the lead.
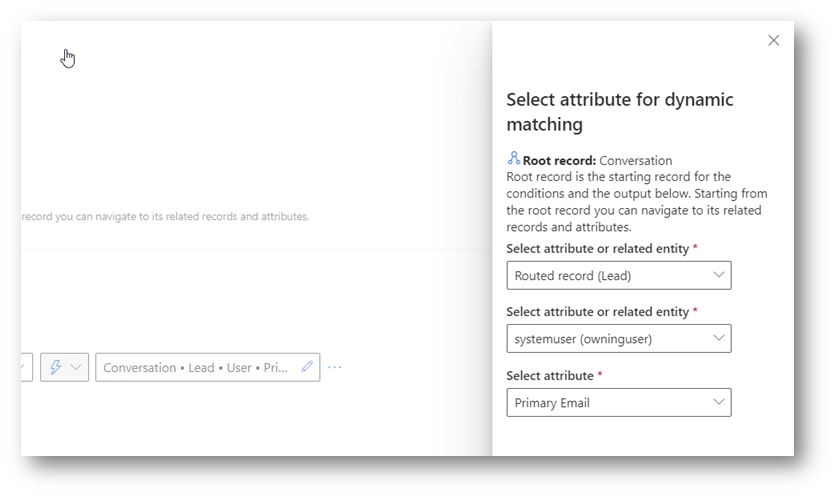
The result being that I will assign records if the primary email of the agent matches the email address of the owner of the lead.
In my example this condition will always return no agents or just one match. If multiple matches were returned, we can then apply an “order by” logic to decide which agent will be used. But for this assignment rule the order has no impact!
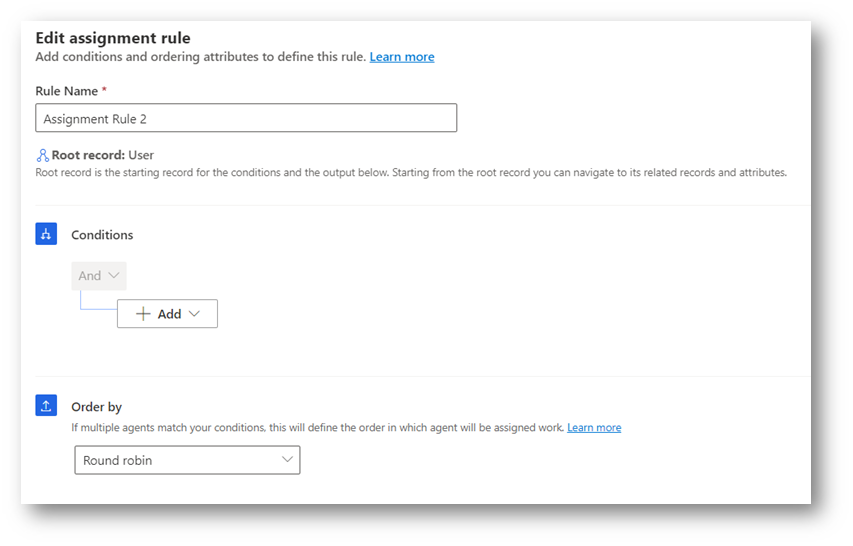
So far, any lead that is owned by a particular user will be assigned to that user. But if no user is found (because the lead is assigned to a team) then my second rule will come into play.
My second rule is shown below. It has no condition. But notice that the order by field have been set to “round robin”. Meaning leads assigned to a team will end up being assigned to the members of my queue in a round robin.
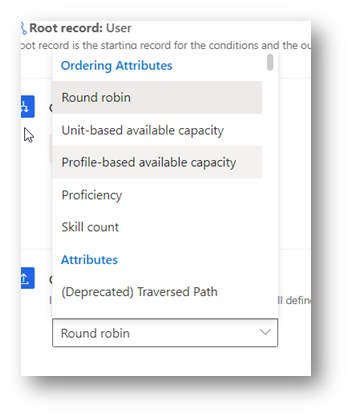
Other “order by” options exist. I could have selected unit-based, profile based and more. Unit based (for example) could have been used to allocate leads to the person in the queue with the highest spare capacity. Or maybe I could have used a profile that would allocated “n” leads per day to each user. (etc.)
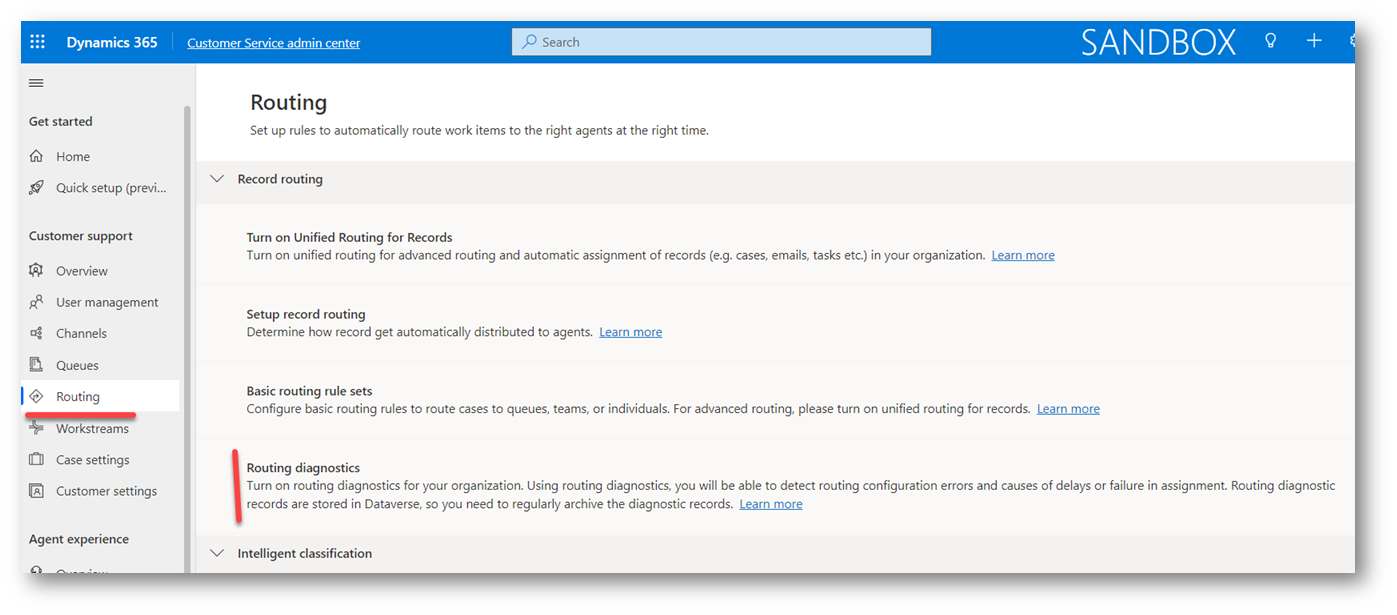
I hope you can see that this example could be tailored to create very specific custom assignment rules as required. I guess the only challenge is that your rules could get very complicated! This is where I found the routing diagnostics became very useful.
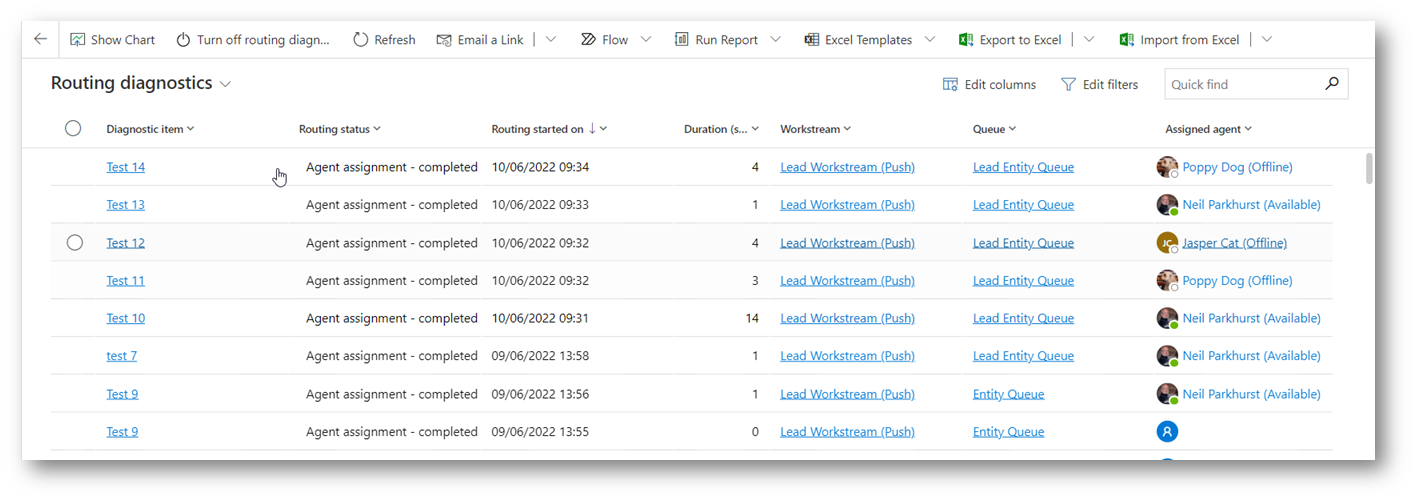
If you open the “Routing” option, you will find the “Routing diagnostics” option.
Below you can see that in my diagnostics I could see which queue and user the lead had been routed to. Meaning I found it easy to repeatedly create leads and confirm they were being allocated to the users as I required.
If / when they aren’t allocated as expect you can open each row in the diagnostics to view more information about the routing / assignment rules that have been applied.
Tip:
The diagnostics aren’t on by default. So, you will need to click “Turn on routing diagnostics” to being to capture this data.
Second Tip: Omnichannel changes take upto 15 minutes to apply. So if you tweak your rule you’ll need to be patient.
Hopefully this blog post has helped show one example of when we might want to use a custom assignment rule. And I hope it might have given you some ideas on how to refine your assignment logic.
You can also read Microsoft documentation on assignment rules to further understand the possibilities.
Assignment methods for queues | Microsoft Docs
Enjoy.


Leave a comment